Golden: A Comprehensive Guide
Discover Golden‚ Colorado! This guide unveils its rich history‚ vibrant culture‚ outdoor adventures‚ and delightful dining – a perfect weekend escape awaits every traveler.
Origins and History of Golden‚ Colorado
Golden’s story began during the exhilarating Pikes Peak Gold Rush of 1859. Initially established as a mining camp on June 16th‚ it was originally named Golden City‚ a tribute to the prospector Thomas L. Golden. Strategically located along Clear Creek‚ at the foothills of the majestic Front Range of the Rocky Mountains‚ the area quickly attracted hopeful miners and settlers.
For over two decades‚ the city has diligently pursued a long-term vision for the Highway 93 corridor‚ aiming to benefit both the local community and the numerous travelers passing through. Golden’s early days were defined by the promise of wealth and the rugged spirit of the Wild West‚ laying the foundation for the charming city it is today.
The Founding of Golden City
Golden City’s birth was directly linked to the fervent excitement of the Pikes Peak Gold Rush. Founded on June 16‚ 1859‚ the initial settlement quickly sprang up as a bustling mining camp‚ fueled by the dreams of striking it rich. The name itself honored Thomas L. Golden‚ a key figure in those early prospecting days.
Its location along Clear Creek proved vital‚ providing water for mining operations and transportation. Early settlers envisioned a thriving community‚ and despite the challenges‚ Golden City persevered‚ establishing itself as a significant hub in the Colorado Territory. This marked the beginning of a long and colorful history.
Golden’s Connection to the Pikes Peak Gold Rush
The discovery of gold in the Pikes Peak region in the late 1850s dramatically shaped Golden’s destiny. Prospectors flocked to the area‚ and Golden City emerged as a crucial supply point and transportation hub for those heading to the goldfields. Its strategic location along Clear Creek facilitated the movement of miners and essential goods.
The initial boom brought rapid growth and a diverse population. While not a major gold-producing site itself‚ Golden thrived by serving the needs of the surrounding mining camps‚ solidifying its importance during this pivotal era in Colorado’s history.
Golden as a Cultural Hub
Golden boasts a thriving arts and music scene‚ enriching the community and attracting visitors. From local galleries showcasing diverse artistic expressions to live music venues hosting a range of performances‚ cultural experiences abound. The city actively fosters creativity and provides platforms for artists to share their talents.
Furthermore‚ Golden embraces unique cultural encounters‚ such as visits from the Longneck tribe‚ offering immersive experiences and broadening perspectives. This blend of traditional and contemporary arts establishes Golden as a vibrant cultural destination.
The Golden Triangle and Historical Tours
Explore Golden’s rich past through guided tours and the captivating Golden Triangle area. A guided tour ensures safe passage and insightful commentary‚ highlighting historical landmarks and significant sites. The boat tour offers a unique perspective‚ blending history and scenic beauty along Clear Creek.

Delve into the city’s origins‚ tracing back to its founding during the Pikes Peak Gold Rush in 1859‚ originally named Golden City in honor of Thomas L. Golden. These tours provide a comprehensive understanding of Golden’s evolution and cultural heritage.
Local Arts and Music Scene
Golden‚ Colorado‚ pulses with a vibrant arts and music scene‚ offering diverse experiences for every taste. From live performances to local markets‚ the city fosters creativity and community engagement. Discover unique artistic expressions and enjoy the energy of local musicians.
Golden consistently hosts events‚ ensuring there’s “always something happening.” Explore the local offerings‚ immerse yourself in the cultural atmosphere‚ and support the thriving artistic community. Simply “show up and explore” to uncover hidden gems and unforgettable moments within Golden’s artistic landscape.

Outdoor Activities in Golden
Golden‚ Colorado‚ is an outdoor enthusiast’s paradise‚ nestled at the base of the Rocky Mountains along Clear Creek. The city provides endless opportunities for adventure‚ from exhilarating hikes and scenic bike trails to breathtaking views. Explore the natural beauty surrounding Golden and immerse yourself in the stunning landscape.
Clear Creek offers fantastic recreational possibilities‚ while the nearby mountains beckon with challenging trails and panoramic vistas. Whether you seek adrenaline-pumping activities or peaceful nature walks‚ Golden delivers an unforgettable outdoor experience for all skill levels.
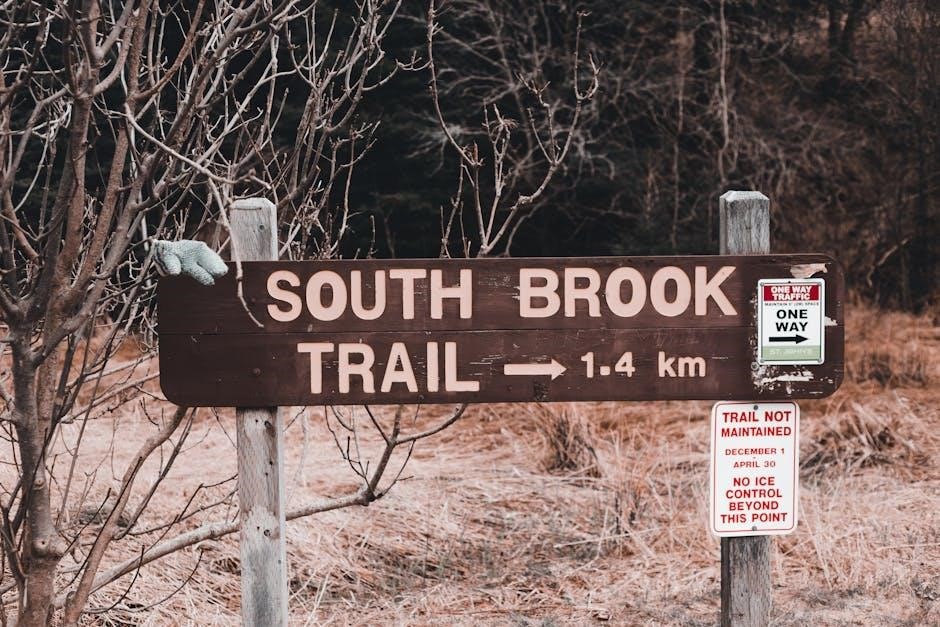
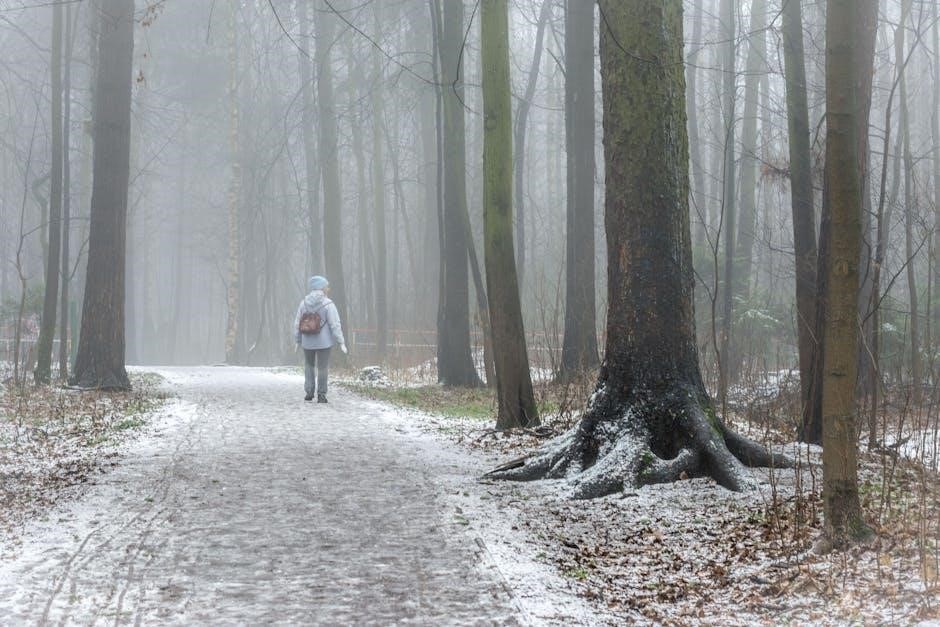
Hiking and Biking Trails along Clear Creek
Clear Creek’s trails offer diverse experiences for hikers and bikers alike. From leisurely strolls along the paved Clear Creek Trail to more challenging climbs into the foothills‚ there’s a path for every ability. Bikers can enjoy scenic routes with varying terrain‚ perfect for both casual rides and mountain biking adventures.
These trails provide stunning views of the surrounding mountains and the creek itself‚ creating a truly immersive outdoor experience. Explore the natural beauty of Golden while enjoying a healthy and invigorating activity – a perfect way to spend a day!

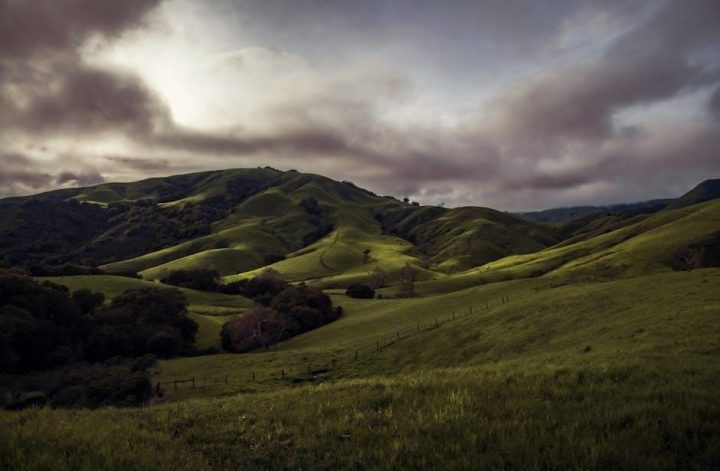
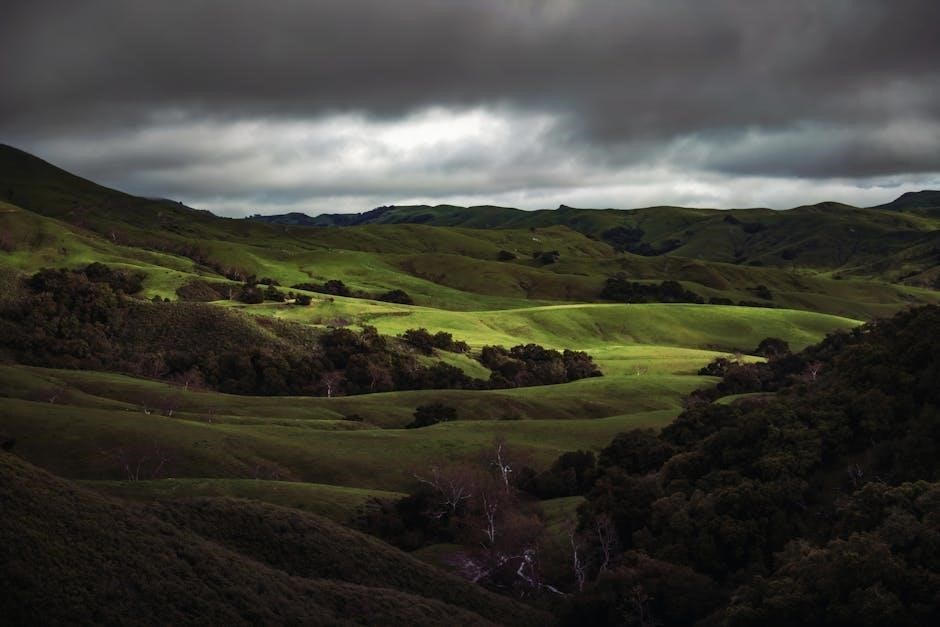
Scenic Views of the Rocky Mountains
Golden’s location at the base of the Front Range provides breathtaking panoramic views of the Rocky Mountains. The majestic peaks dominate the skyline‚ offering a stunning backdrop for outdoor activities and leisurely exploration. Capture unforgettable photos and immerse yourself in the grandeur of nature.
Whether you’re hiking‚ biking‚ or simply relaxing in town‚ the mountains are a constant‚ awe-inspiring presence. Enjoy the crisp mountain air and the unparalleled beauty of the Colorado landscape – a truly unforgettable experience awaits!
Dining Experiences in Golden
Golden offers a diverse culinary scene to satisfy every palate. From casual eateries to upscale dining‚ you’ll find a range of options to enjoy. Golden Corral Buffet & Grill remains a local favorite‚ consistently praised for its delicious food‚ excellent service‚ and recent renovations.
Beyond the buffet‚ explore the thriving craft brewery scene paired with local cuisine. Savor flavorful dishes and refreshing brews while enjoying the charming atmosphere of this historic town. Prime Rib is a standout choice for a truly satisfying meal!
Golden Corral Buffet & Grill: A Local Favorite
Golden Corral Buffet & Grill consistently receives positive feedback as a beloved dining destination in Golden‚ Colorado. Patrons frequently commend the restaurant for its delicious food offerings and consistently excellent service‚ creating a welcoming atmosphere for all. Recent renovations have further enhanced the dining experience‚ providing a refreshed and appealing environment.
The buffet remains reliably well-stocked‚ offering a wide variety of choices‚ including a particularly praised Prime Rib with a very nice taste. It’s a popular choice‚ especially for breakfast‚ making it a convenient and satisfying meal option.
Craft Breweries and Local Cuisine
Golden‚ Colorado‚ boasts a thriving culinary scene‚ particularly renowned for its exceptional craft breweries and diverse local cuisine. Visitors can explore a variety of establishments offering unique brews and flavorful dishes‚ catering to every palate. From cozy pubs to upscale restaurants‚ Golden provides a delightful gastronomic journey.
Enjoying a locally crafted beer alongside a delicious meal is a quintessential Golden experience. The town’s commitment to quality ingredients and innovative culinary techniques ensures a memorable dining adventure for both residents and tourists alike.
Accommodation Options in Golden
Golden‚ Colorado‚ offers a diverse range of lodging options to suit every traveler’s preference and budget. Whether you seek modern hotels with premium amenities‚ scenic RV parks for a nature-immersed stay‚ or the charm of boutique and historic inns‚ Golden has something for everyone.
These exceptional lodging experiences cater to various travel styles‚ ensuring a comfortable and memorable visit. From luxurious accommodations to cozy retreats‚ Golden provides a welcoming haven after a day of exploration and adventure in the Rocky Mountain foothills.
Hotels and Modern Lodging
Golden boasts a selection of contemporary hotels providing comfort and convenience for visitors. These establishments typically feature well-appointed rooms‚ modern amenities‚ and convenient locations for exploring the city and surrounding natural beauty. Expect options ranging from familiar national chains to locally-owned boutique hotels.
Guests can anticipate services like complimentary breakfast‚ fitness centers‚ and business facilities. Modern lodging in Golden caters to both leisure and business travelers‚ offering a relaxing base for experiencing all that this Colorado gem has to offer.
RV Parks and Boutique Inns
For travelers seeking unique experiences‚ Golden offers charming boutique inns and well-equipped RV parks. RV parks provide full hookups and scenic locations‚ ideal for exploring the Rockies at your own pace. Boutique inns deliver personalized service and historic ambiance‚ often housed in beautifully restored buildings.
These smaller accommodations emphasize character and local flavor‚ offering a cozy alternative to larger hotels. Whether you prefer the freedom of the open road or intimate hospitality‚ Golden’s diverse lodging options cater to every preference and travel style.
Golden in Popular Culture
Golden‚ Colorado‚ has recently found a unique place within the entertainment world‚ notably through the film KPop Demon Hunters. The movie’s soundtrack features original songs performed by EJAE‚ Audrey Nuna‚ and REI AMI‚ embodying the film’s fantastical narrative of demon-fighting protectors.
The symbolism of “Golden” within the film represents a powerful force‚ the Honmoon‚ watching over humanity. Beyond cinema‚ Golden’s scenic beauty and historical significance continue to inspire artists and storytellers‚ solidifying its cultural presence.
KPop Demon Hunters: The “Golden” Soundtrack
The soundtrack for KPop Demon Hunters is a vibrant blend of talent‚ featuring singer-songwriter EJAE as Rumi‚ Audrey Nuna portraying Mira‚ and REI AMI embodying Zoey. These artists lend their voices to a narrative centered around protecting the world from demonic forces and sealing their universe.
The music isn’t merely background accompaniment; it’s integral to the story‚ reflecting the power of the Honmoon – a symbolic guardian. The soundtrack elevates the film’s action and emotional depth‚ captivating audiences.

The Symbolism of “Golden” in Media
The term “golden” frequently appears in media‚ often representing ideals of perfection‚ value‚ and a cherished past. In KPop Demon Hunters‚ “Golden” signifies a powerful force – the Honmoon – watching over humanity. This echoes historical connotations of gold as a symbol of divinity and enduring strength.
Beyond this specific example‚ “golden” evokes images of opportunity (the Golden State)‚ treasured memories (golden years)‚ and exceptional quality. Its consistent use highlights a universal human desire for something precious and lasting.
Highway 93 Corridor Development
For over two decades‚ the City of Golden has actively pursued a long-term vision for the Highway 93 corridor. This ambitious project aims to balance the needs of the Golden community with the significant volume of travelers passing through the area.

Development focuses on improving traffic flow‚ enhancing pedestrian safety‚ and fostering economic growth along the corridor. Careful consideration is given to preserving Golden’s unique character while accommodating increased accessibility. The goal is a sustainable and harmonious integration of transportation and community life.
Long-Term Vision for the Highway
Golden’s long-term vision for Highway 93 centers on creating a corridor that serves as a gateway‚ not a barrier. This involves thoughtful planning to enhance both community connectivity and traveler experience.
The plan prioritizes multi-modal transportation options‚ including improved pedestrian and bicycle infrastructure. It also envisions strategic development that supports local businesses and preserves Golden’s historic charm. Ultimately‚ the goal is a vibrant‚ accessible‚ and sustainable corridor that benefits residents and visitors alike‚ fostering a thriving future for Golden.
Community and Traveler Considerations

Golden warmly welcomes both its residents and the many visitors who explore its unique charm. Balancing the needs of both groups is paramount to the city’s continued success.
Efforts are consistently made to preserve Golden’s small-town atmosphere while accommodating increased tourism. This includes supporting local businesses‚ maintaining historical integrity‚ and providing accessible amenities for all. Thoughtful planning ensures a positive experience for travelers‚ while simultaneously protecting the quality of life for the Golden community‚ fostering a harmonious coexistence.
The Golden Retriever Breed
The Golden Retriever is globally renowned for its cheerful disposition and friendly nature‚ embodying a truly jovial attitude. This breed consistently ranks among the most popular family pets worldwide‚ and for good reason!
Their intelligence‚ combined with an affectionate and gentle temperament‚ makes them exceptionally well-suited for families. Golden Retrievers thrive on companionship and are eager to please‚ making training a rewarding experience. They are active dogs requiring regular exercise‚ but their loving personalities make them wonderful additions to any home.
Characteristics and Temperament
Golden Retrievers are celebrated for their intelligence‚ friendliness‚ and unwavering loyalty. They possess a naturally gentle and playful temperament‚ making them excellent companions for individuals and families alike. These dogs are known for their eagerness to please‚ which simplifies training and strengthens the bond with their owners.
Physically‚ they are strong and muscular‚ with a dense‚ water-repellent coat. Their expressive eyes and feathered tails contribute to their endearing appearance. Golden Retrievers are active and require regular exercise to maintain their physical and mental well-being‚ thriving on interaction and play.
Popularity as a Family Pet
Golden Retrievers consistently rank among the most popular dog breeds globally‚ and for good reason. Their amiable and tolerant nature makes them exceptionally well-suited for family life‚ particularly with children. They are patient‚ playful‚ and protective‚ readily integrating into a bustling household.
Beyond their temperament‚ their intelligence facilitates training‚ ensuring they become well-behaved members of the family. Their energetic disposition encourages an active lifestyle‚ promoting outdoor adventures and bonding experiences. The breed’s affectionate demeanor and unwavering loyalty solidify their position as cherished family companions.
Visiting Golden: Practical Information
Planning a weekend getaway to Golden‚ Colorado is remarkably easy! The city offers a diverse range of activities‚ from exploring live music venues and vibrant markets to embarking on scenic hikes and discovering captivating attractions. Golden welcomes visitors with open arms‚ promising a memorable experience.

Don’t miss the opportunity to savor local craft beers and indulge in delicious cuisine. With something always happening‚ simply arrive and immerse yourself in the city’s charm; Consider exploring the Golden Triangle and taking a boat tour for a deeper dive into history and culture.

Things to Do on a Weekend Getaway
Golden‚ Colorado‚ provides an abundance of options for a fulfilling weekend escape! Immerse yourself in the local arts and music scene‚ or explore the unique events and markets that frequently pop up. For outdoor enthusiasts‚ scenic hikes along Clear Creek and breathtaking views of the Rocky Mountains await.
Consider a visit to the Golden Triangle‚ perhaps enjoying a delightful boat tour. A truly unique experience could involve learning about a Longneck tribe and their cultural traditions. Remember to look for available discounts to enhance your trip!
Events and Markets in Golden
Golden consistently buzzes with activity‚ offering a diverse range of events and markets throughout the year. From lively live music performances showcasing local talent to bustling markets filled with unique crafts and goods‚ there’s always something happening. These gatherings provide a fantastic opportunity to connect with the community and experience Golden’s vibrant spirit.
Keep an eye out for special cultural experiences‚ like potential visits offering insights into the traditions of a Longneck tribe. Simply showing up and exploring is often the best way to discover hidden gems!
Longneck Tribe Visits and Cultural Experiences
Golden offers unique opportunities to engage with diverse cultures‚ notably through potential visits from a Longneck tribe. These experiences provide invaluable insights into their traditions‚ artistry‚ and way of life‚ fostering cross-cultural understanding and appreciation. Such encounters are often highlighted as memorable parts of a Golden visit.

These cultural exchanges enrich the visitor experience‚ moving beyond typical tourist attractions to offer authentic and meaningful interactions. Exploring these opportunities adds a unique dimension to any Golden getaway.
Discounts and Travel Tips
Planning a Golden‚ Colorado trip? Look for seasonal discounts on lodging and attractions‚ especially during shoulder seasons. Consider purchasing a city pass for bundled savings on popular sites. Weekday visits often mean lower hotel rates and fewer crowds. Explore free activities like hiking Clear Creek trails and enjoying scenic views.
Utilize online resources for coupons and special offers. Booking accommodations and tours in advance can also secure better deals. Fifteen discounts are available‚ making Golden an affordable destination!